Brian Long Consultancy & Training Services
Ltd.
January 2012
Android devices have become very prominent over the last couple of years and represent a useful market sector to target for business applications. Traditional Android development is done in Java using the Eclipse IDE, but this is not the only way to build Android apps.
With Oxygene for Java, formerly known as Project "Cooper" from RemObjects, you have all you need to develop and debug applications for deployment to Android phones and tablets. This tutorial looks at getting started with the process of building Android applications with Oxygene, getting to understand the build process and what goes on in an Android application.


As well as working with Microsoft’s .NET with Delphi Prism (aka Oxygene for .NET), you can also use the Oxygene language to build applications for the Java platform with Oxygene for Java. This allows you to take your existing Delphi or Oxygene programming skills and immediately make use of them in the Java world, making use of the countless Java libraries and frameworks that exist. It also means you can develop applications for Java and Google's Android. Oxygene for Java is seen by many as a Delphi for Android, at least at the language level.
When targeting Android, Oxygene for Java includes the required tooling to build, package, sign, debug and deploy Android applications. Oxygene for Java cuts out the need to learn the Java programming language and the Eclipse IDE, meaning you can retain your Object Pascal programming skills and work in the familiar environment of Visual Studio while still producing native Android apps.
Oxygene for Java was launched on 30th November 2011. It offers several things to facilitate generating native Android applications:
Let's take a look at the process of getting set up for developing Android applications with Oxygene for Java on Windows.
Note: Oxygene for Java requires Visual Studio 2010 or Visual Studio 2012 (official support is present in the August 2012 update of Oxygene for Java). If you do not have a copy of Visual Studio then Oxygene will install the Visual Studio 2012 Shell and work within that.
The Android SDK has various dependencies on the Java SE Development Kit (JDK) so this must be installed first.
You can download the JDK from Oracle's web site (click the JDK link).
Note: The JDK is a superset of the JRE (Java Runtime Environment). The JRE is insufficient; it's the JDK that must be installed. The JDK installer will install the JDK and also the JRE.
Note: You must install the 32-bit JDK, even on 64-bit Windows.
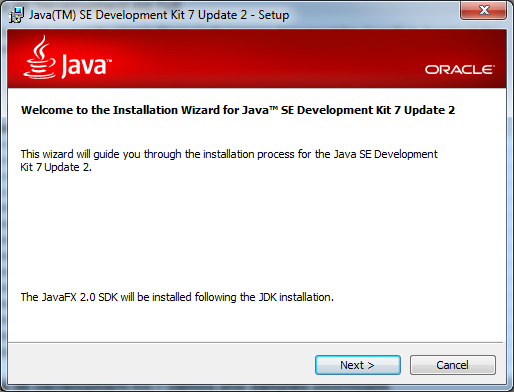
At the time of writing the current version is JDK 7 Update 2 and the installer is
called jdk-7u2-windows-i586.exe (84.04 MB).
Note: Once JDK 7 has informed you of successful installation, a
Continue button then offers to install JavaFX 2.0 SDK. For Android
development with Oxygene for Java this is unnecessary and you can close the JavaFX
SDK installer without any issues.
Note: It is recommended to add the JDK's bin directory to the system
PATH (see below for information on how to add to the system
PATH). So, for example on 64-bit Windows with the JDK version mentioned above, you'd
add C:\Program Files (x86)\Java\jdk1.7.0_02\bin to the PATH, and on
32-bit Windows you'd add C:\Program Files\Java\jdk1.7.0_02\bin.
The installation is quite straightforward.

This involves a couple of steps.
Firstly, download the Android SDK installer from the Android SDK page.
Note: the SDK installer is available as a ZIP file to unzip where
you choose (currently called android-sdk_r16-windows.zip at 28 MB)
or as an installer executable (currently called installer_r16-windows.exe
also at 28 MB). It is recommended to use the executable installer, as this puts
things in standard locations and also adds registry entries identifying where the
SDK is found and adds a Start Menu folder for the Android SDK Tools.
If you simply unzip the zipped version, these registry entries will not be present
and Oxygene for Java will not be able to locate the SDK, meaning you will have to
take extra steps to help it out by setting a dedicated Oxygene for Android option
in the Visual Studio IDE (see later).
Note: If the installer complains that the JDK cannot be found,
just click the installer's Back button followed by the Next
button and it should find it on the second attempt.
Secondly, to pull down the main parts of the Android SDK, run the SDK Manager. If
you used the zipped version of the SDK installer you will need to locate and run
the program SDK Manager.exe from wherever you unzipped the files to.
By default this will be C:\Program Files\Android\android-sdk-windows\SDK Manager.exe,
or C:\Program Files (x86)\Android\android-sdk-windows\SDK Manager.exe
if running in 64-bit Windows.
Note: if you are running Windows Vista or Windows 7 you should
run the SDK Manager as an Administrator (use the menu item on the application shortcut's
context menu). This is because the installer defaults to installing the Android
SDK materials under C:\Program Files and this is a protected directory
in recent versions of Windows. When the SDK Manager starts downloading the required
portions of the SDK it will need administrative privileges to avoid simply failing.
Alternatively you could change the default installation directory and install elsewhere,
for example in a new C:\Android directory.
You can now choose parts of the SDK to install. You must install the Android SDK Tools and the Android SDK Platform-tools. In addition you can choose which versions of the Android API to install. Each API version relates to a different release of Android. So, for example, Android 2.2 (API 8) is the FroYo release of Android and Android 2.3.3 (API 10) is the updated (maintenance release) Gingerbread release.
You can also choose to install a local copy of the API documentation if you wish. This allows access to the reference materials when not connected to the Internet.
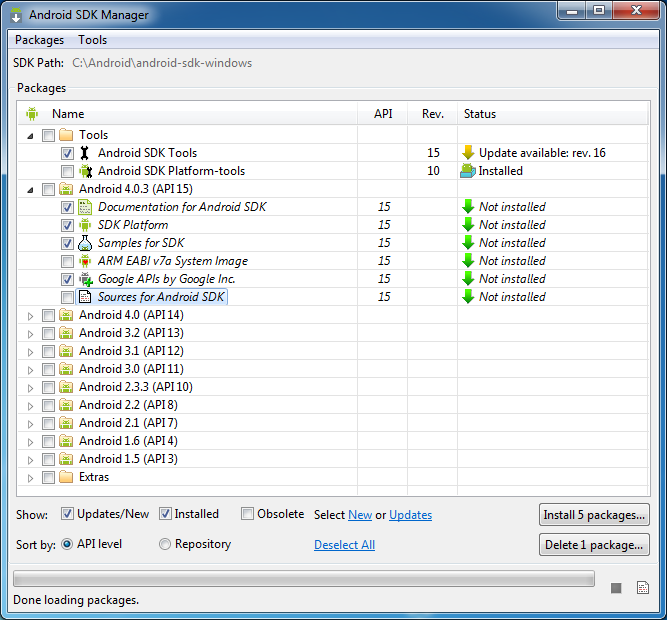
Note: the packages available for download by the SDK Manager are regularly updated, and so the revisions shown in the screenshot above may be different to what you see. Additionally, the documentation package available is typically for the latest available API release and so will be found as one of the options for the latest available API release (as in the screenshot above).
Note: Once you have an updated tools directory in
your Android SDK directory you can also invoke the SDK Manager by launching android.bat,
a batch file found in this tools subdirectory.
To ensure you can readily run commands at later points you should add a couple of the Android SDK folders onto the system PATH.
To edit the system environment variables you need to go to the Advanced page of the System properties dialog. A couple of shortcut ways of getting there are:
˙+Break then click
on Advanced system settings ˙+R, type
systempropertiesadvanced and press Enter
Now click Environment Variables..., select PATH from the list of System
variables, press Edit... and add additional semicolon separated paths.
The paths to add are the tools and platform-tools folders
under the SDK directory, so on a 64-bit Windows system with default installation
that means adding these folders:
C:\Program Files (x86)\Android\android-sdk-windows\toolsC:\Program Files (x86)\Android\android-sdk-windows\platform-toolsIn order to test your applications on various potential device configurations you can set up emulators (Android Virtual Devices or AVDs) for different screen sizes, densities, Android platform and SD card size.
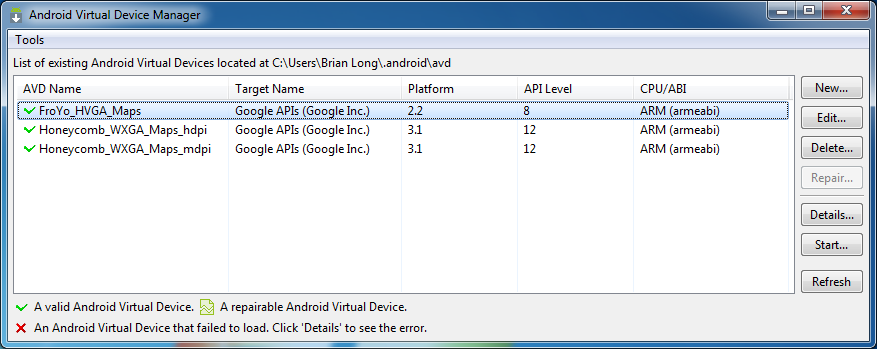
You can launch the Android Virtual Device Manager in various ways:
android avd (i.e. passing avd as a command-line
parameter to the android.bat batch file)
Use the New... button to create a new AVD, choose its attributes and
give it a name.
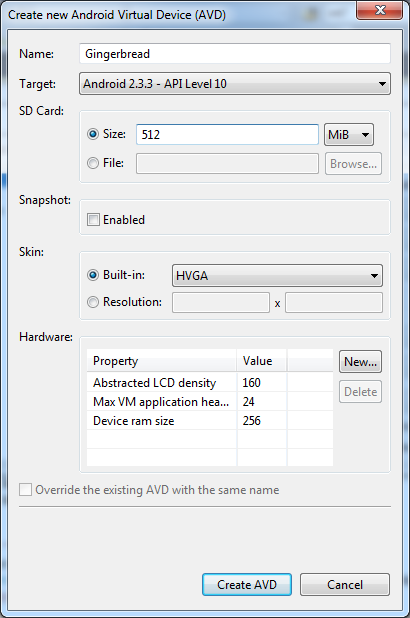
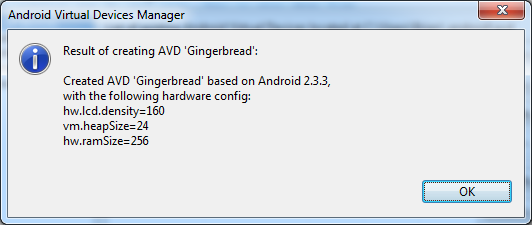
Pressing the Create AVD button will create the virtual device and indicate
success with a message like this:
You can see in the earlier screenshot that the Virtual Devices page tells you these
emulator images are stored in %USERPROFILE%\.android\avd - in my case
this expands to the C:\Users\Brian Long\.android\avd folder.
Note: It should be mentioned again that if you decide to install
additional packages after invoking the SDK Manager through the android batch file,
you will likely need to have launched it with administrative privileges. You can
do so by running the batch file from a command prompt that was run as administrator.
An alternative in Windows 7 and (I think also) in Windows Vista is to press ˙ to bring up the Start menu, type in
the android command, then press Ctrl+Shift+Enter to run
the command as administrator (where just pressing Enter would run as
the logged in user).
Note: You can start the Android emulator, specifying a particular
AVD either by selecting it in the Android Virtual Device Manager and pressing the
Start... button or by using the emulator.exe command from a command-line.
For example, the Gingerbread AVD being created in the screenshot above can be started
with this command-line:
emulator -avd Gingerbread
or even this abbreviated command-line:
emulator @Gingerbread
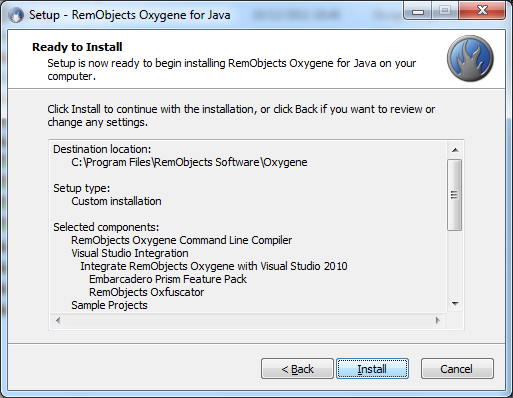
Lastly you need to install Oxygene for Java. You can either purchase Oxygene for Java from the RemObjects store or download the trial version. It costs $399 (or $599 if you purchase it with its sister product Oxygene for .NET (aka Delphi Prism). The trial version is fully functional other than being limited to 30 day's usage. Either way, the installation is straightforward:
Go back to the top of this page
Go back to start of this article