 A
A),
and secondly by right-clicking the image in the project and choosing Build Action,
Content (if this causes Xcode to be brought to the front, just dimsiss it - it's
not needed here).

Brian Long Consultancy & Training Services
Ltd.
February 2012
Accompanying source files available through this
download link
On the main view of your Utility Project you can clearly put what you like. In this case we will add an image. We could use Xcode's Interface Builder to add an appropriate control to the main view and set its attributes but this time weíll skip Interface Builder and do it solely in code.
To add an image to an iOS project you can copy the file into the source directory
tree; mine is called Fire.jpg (whose dimensions are smaller than that of an iPhone
screen) and has been placed in the projectís main directory alongside the source.
In MonoDevelop you notify the project of the imageís existence firstly by adding
the image to the project (right-click the project and choose Add, Add Files... or
press
),
and secondly by right-clicking the image in the project and choosing Build Action,
Content (if this causes Xcode to be brought to the front, just dimsiss it - it's
not needed here).![]()
![]() A
A
Now in the main view controllerís ViewDidLoad() you can write:
using System.Drawing;
...
public override void ViewDidLoad()
{
base.ViewDidLoad();
//Deal with image
var image = new UIImage("Fire.jpg");
var imageView = new UIImageView(image);
var appF = UIScreen.MainScreen.ApplicationFrame;
var imgS = image.Size;
imageView.Frame = new RectangleF((appF.Width - imgS.Width) / 2,
(appF.Height - imgS.Height) / 2, imgS.Width, imgS.Height);
View.AddSubview(imageView);
}
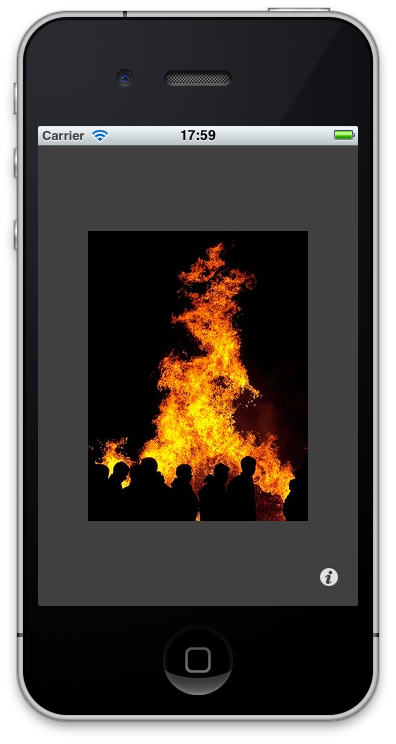
This loads the image file into an Image control, adds it to an image view, sets the image view frame to be centered in the application frame and finally adds the image view into the main view. The main view of the application can now be seen below. Something a little more helpful and informative would be better in a real application, but there is a loose reason why the picture was chosen. This is a temperature conversion program and fires imply high temperatures.

If you want to play about you could make this image draggable. Letís build a new
class UIDraggableImageView that inherits from UIImageView
and supports being dragged around. The class is actually quite simple and operates
by overriding the methods TouchesBegan(), TouchesMoved()
and TouchesEnded() to shift the image viewís frame around based upon
where the user drags their finger. You may recall we used those methods to track
touch movement in an earlier project.
The class looks like this:
using System.Drawing;
using MonoTouch.Foundation;
using MonoTouch.UIKit;
...
public class UIDraggableImageView: UIImageView
{
public UIDraggableImageView(UIImage image): base(image)
{
UserInteractionEnabled = true;
}
private PointF startLocation;
private void MoveImage(NSSet touches)
{
//Move relative to the original touch point
var pt = (touches.AnyObject as UITouch).LocationInView(this);
//Use a separate frame var to ensure both new coordinates are set at once
var frame = Frame;
var appFrame = UIScreen.MainScreen.ApplicationFrame;
frame.X += pt.X - startLocation.X;
if (frame.X < 0)
frame.X = 0;
if (frame.X + Image.Size.Width > appFrame.Width)
frame.X = appFrame.Width - Image.Size.Width;
frame.Y += pt.Y - startLocation.Y;
if (frame.Y < 0)
frame.Y = 0;
if (frame.Y + Image.Size.Height > appFrame.Height)
frame.Y = appFrame.Height - Image.Size.Height;
Frame = frame;
}
public override void TouchesBegan(NSSet touches, UIEvent evt)
{
var pt = (touches.AnyObject as UITouch).LocationInView(this);
startLocation = pt;
Superview.BringSubviewToFront(this);
}
public override void TouchesMoved(NSSet touches, UIEvent evt)
{
MoveImage(touches);
}
public override void TouchesEnded (NSSet touches, UIEvent evt)
{
MoveImage(touches);
}
}
Since the image is intended for single touch, TouchesBegan() just plucks
any of the touch objects from the passed in set; typically there will only be one
anyway. The location of that touch is then recorded as the starting point. As the
userís finger is moved around the MoveImage() helper routine does the
job of incrementing or decrementing the x and y coordinates of the frame and ensuring
it is kept inside the screen boundaries.
Just change the line in MainViewController.cs from this:
var imageView = new UIImageView(image);
to this and you have a draggable image:
var imageView = new UIDraggableImageView(image);
This class was based on a code snippet from http://monotouchexamples.com.
The example above includes an image but it is embedded in one of the views. A common aspect of commercial applications is a launch screen (or splash screen), which serves to distract the user from the length of time the application takes to start up and initialize. The Apple UI guidelines suggest that a splash screen should be an image of the application running but this is often ignored. Applications typically include company marketing information, logos for the application and the company etc.
So how do we include a splash screen? Moreover, how do we include icons so our applications stand out a little more than they currently do?
![]()
![]()
The answer to the questions is to add various specially named files to the project and set their Build Action to Content. Letís look at a launch screen first.
To incorporate a launch screen it is simply a matter of adding a file called Default.png to your project (not forgetting, of course, to set its Build Action to Content), set to a size of 320x480 (the iPhone resolution is 320x480, but the status bar will hide 20 pixels from the top of the image).
That image will work for iPhone 3 and iPod Touch. It will also work with iPhone 4 but you may recall that the pixel resolution of iPhone 4 has doubled. To cater better for the improved display of the iPhone 4 (and to avoid the original image being stretched to fit) you can also include a 640x960 file called Default@2x.png (similarly set to have a Build Action of Content) and this will be used automatically when the application is launched on an iPhone 4.
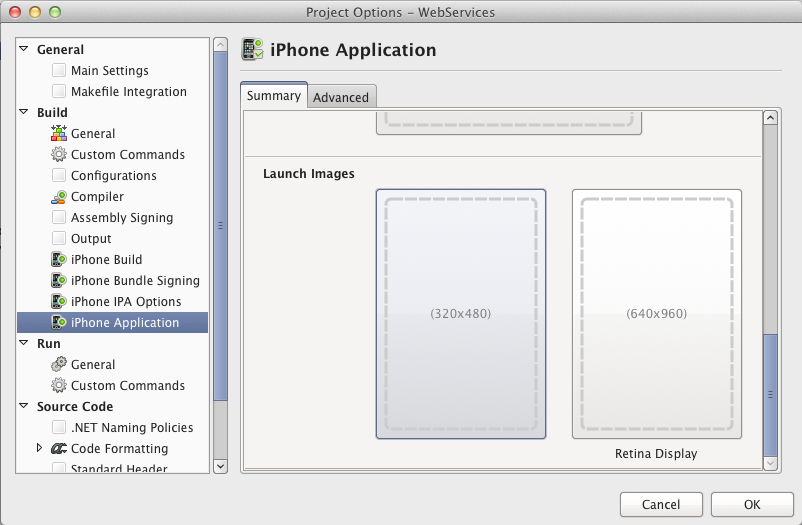
MonoTouch 5 also offers another way to add the launch screen (and other icons) without worrying about the naming system. Right-click on the project name in MonoDevelop's Solution window and choose Options. In the Build section of the project options dialog, select iPhone Application. On the Summary tab you'll see an iPhone Icons section. Here you'll find a place to select an App icon, a Spotlight and Settings icon, an iTunes image and a Launch Image (splash screen). Where different devices have different requirements there are multiple selection options, with the lowest resolution version being the default one to go for.

If you select a suitably sized launch image from this dialog, it will be copied into the project directory, added to the project, named as required and have its Build Action set appropriately.
Note: You can also see these image (and icon) selection options by double-clicking the Info.plist file in the Solution window.
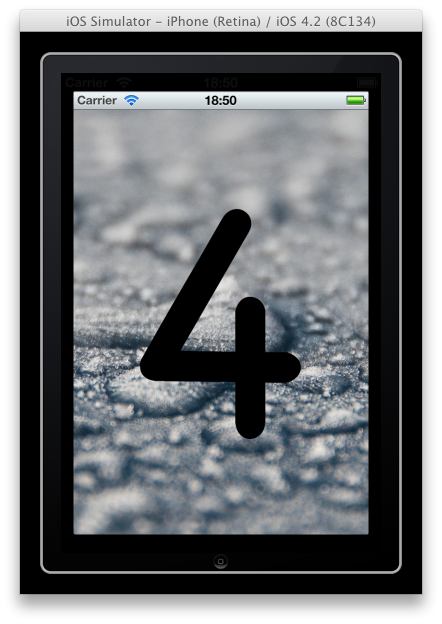
This Utility Project we have been working on is included in the files that accompany this article. In the project are two launch images as per the specification above. They are the same image, a picture of some ice (cold temperature), but Default.png has been shrunk to the smaller resolution. In order to prove the point and be sure the right file is used, a big number 3 has been drawn on the smaller file and a big number 4 on the larger file. The following screenshot shows this same application being launched in the iPhone 4 Simulator.
You can switch between simulating the various hardware options in the Simulator by choosing Hardware, Device and then either selecting iPhone (for the iPhone 3 and iPod Touch Simulator), iPhone (Retina) (for the iPhone 4 Simulator) or iPad.

Go back to the top of this page
Go back to start of this article