
Brian Long Consultancy & Training Services
Ltd.
March 2011
Accompanying source files available through this download link
Note: This introductory tutorial was written for MonoTouch v3.0, as once sold by Novell. Since that time the team behind MonoTouch have left Novell and formed their own company, Xamarin and MonoTouch is up to v5.0 (at the time of editing this note). Additionally, Apple's Xcode development tool is now at v4.0 whereas the version illustrated in the text and screenshots here was v3.x. Consequently various details mentioned in this tutorial are inaccurate with regard to the current version, which clearly isn't too helpful. An updated version of this introductory tutorial can be found here.
This article will give you an introduction to the process of developing an iPhone application using C# on an Apple Mac in the MonoDevelop IDE with the MonoTouch SDK. With the release of Novell’s MonoTouch, iPhone development is no longer confined to Objective-C developers using Xcode; it is now opened up to Mono developers using C# or Delphi Prism.
There is also a much more in-depth and lengthy article that goes into detail on many subjects involved with developing C# applications using MonoTouch available here.
To play along you need a few bits and pieces, which I’ll briefly list:
Note that to actually deploy to an iPhone (or iPad or iPod Touch) you'll need a full version of MonoTouch, which costs $399 and includes a year's worth of updates. You will also need to register with Apple's iPhone Developer Program, which costs $99 per year. To build apps and test them out on the iPhone Simulator costs nothing, assuming you have a Mac.
To show the general idea we’ll build a simple application mimicking a common utility application type: the torch.
In MonoDevelop choose File, New, Solution... and from the C#, iPhone and iPad category choose an iPhone Window-based project. Give it a name of Torch and press OK.
This creates a solution file containing a single project with a number of files. The important files all represent the single main window:
Each window/screen you add to the project typically has a set of files similar to this.
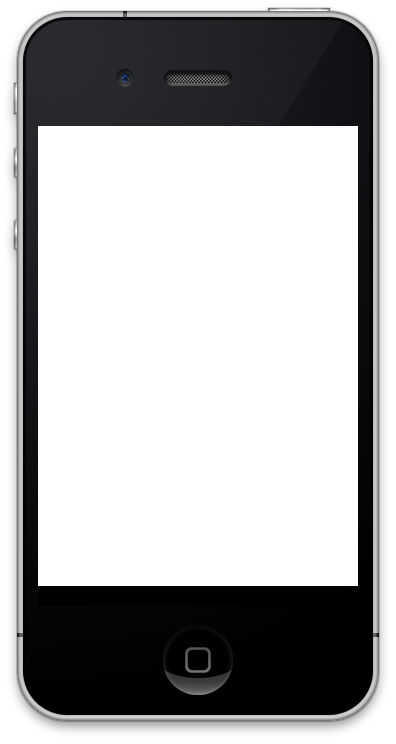
This torch utility will have a button on this window that will ask you to confirm that you want to turn the ‘torch’ on. Assuming you accept the offer it will switch to another screen that is pure white, using the illumination of the screen to act as the ‘torch’. Touching the torch screen will ‘turn off the torch’ and return you to the main screen.
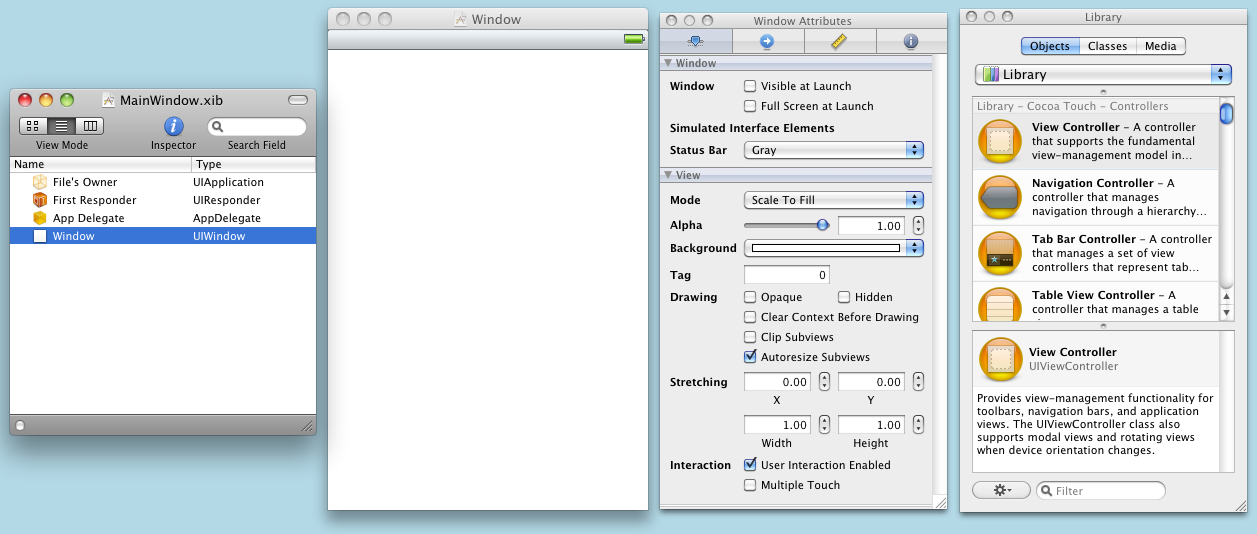
To design the UI double-click the .xib file (referred to as a nib file for historical reasons) in the Solution window and this will load it into Interface Builder (IB) and look something like this:

The four windows here are:
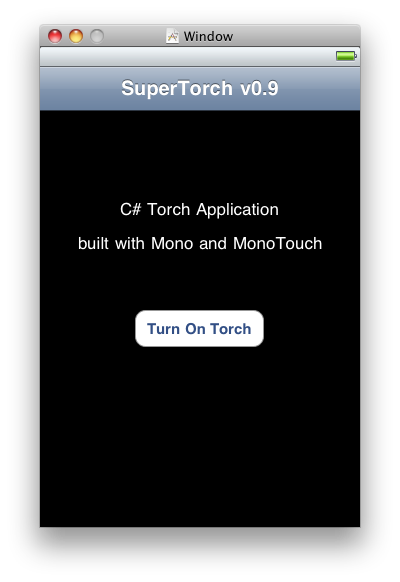
Let’s darken the main application screen by selecting the Window in the Document and setting the Background attribute to Black. Now use the Library (ensure the Objects page is selected) to locate a Round Rect Button (you could type button in the search box at the bottom) and place it on the designer. You can edit the button’s caption using the Title attribute or double-click it. Also add a Navigation Bar and some labels and edit them as desired to make something like this:
We’ll set up an event handler for the button back in the code but to do so we need
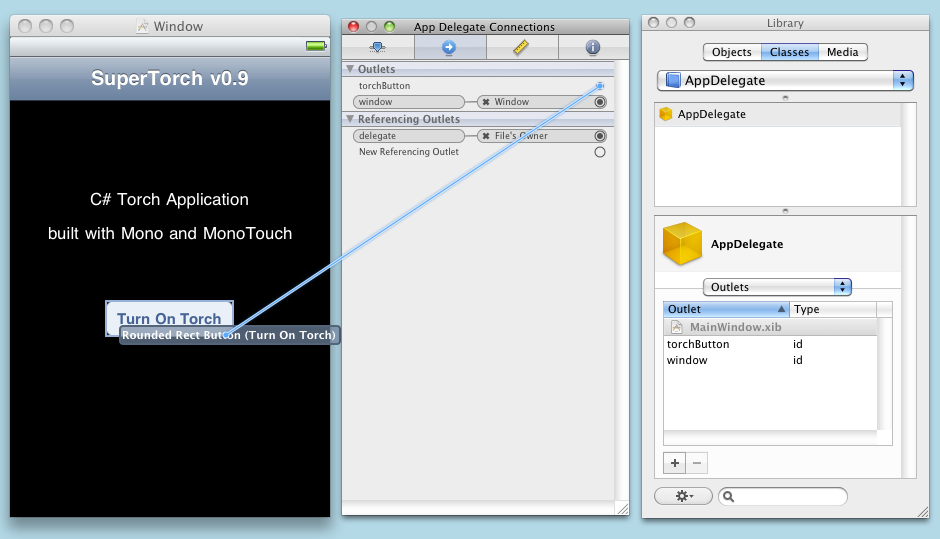
to add a variable for it in IB. On the Classes page of the Library locate
AppDelegate, which you’ll also see present in the Document and find
implemented in Main.cs. In the lower half of the Library window use the dropdown
to select Outlets, which are the IB representation of variables to access UI controls.
Add an outlet called torchButton.
On the third page of the Inspector (the Connections Inspector) you’ll see the outlet listed. To connect it to the button simply drag the circle on the Inspector and drop it on the button.
Save and quit IB and we’ll look at the code.
When the application has loaded up the UI for the main screen the AppDelegate
object’s FinishedLaunching() method executes. In here we’ll set up
the button event handler. The event that fires when the user touches the button
and then releases is TouchUpInside.
MonoDevelop is helpful here in that it can set up the syntax event handler for you, and you get to choose between a regular delegate method, which it will name and implement for you, or an anonymous delegate, with or without parameters. The screenshot below is taken after typing the line you see - the completion list pops up automatically. In this case, choose the delegate option.
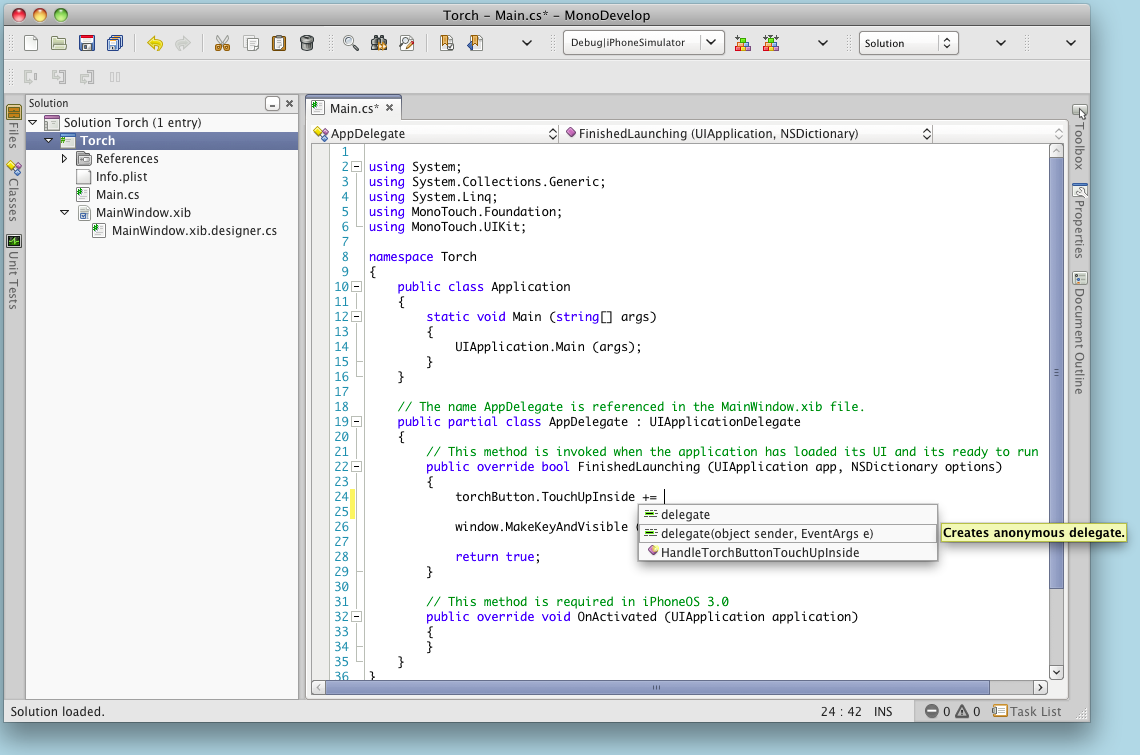
The code in FinishedLaunching() now looks like:
public override bool FinishedLaunching (UIApplication app, NSDictionary options)
{
torchButton.TouchUpInside += delegate {
};
window.MakeKeyAndVisible ();
return true;
}
Before we can write the code in the event handler we need the torch screen. Choose File, New, File... and from the iPhone and iPad category select iPhone View with Controller and call it TorchController. This adds another set of files, defining a view that will go in the window, as well as the view controller (think MVC).
This time we don’t need to do anything to the UI this time – the goal is to have an empty white screen, which helpfully is how this view starts off.
The event handler can now be coded, in conjunction with a new variable declared in the class:
TorchController torchController;
// This method is invoked when the application has
            loaded its UI and its ready to run
public override bool FinishedLaunching (UIApplication app, NSDictionary options)
{
torchButton.TouchUpInside += delegate {
if (torchController == null)
torchController = new TorchController ();
window.AddSubview (torchController.View);
};
window.MakeKeyAndVisible ();
return true;
}
Now we need a little code in the torch screen file. The main code file for the torch
view is TorchController.xib.cs. In order to maximize the screen space used by the
white torchlight this class should remove the iPhone status bar when it is displayed
and restore it when closed. Cue the ViewDidAppear() and ViewDidDisappear()
virtual methods.
Again MonoDevelop is helpful with overriding methods. In the class definition type
the word override and a space and the Code Completion list pops up.
You can then select the method to override, maybe honing in on it by typing the
first couple of characters of the target method name. Select the method you want
and it will insert the method declaration with correct signature, override and visibility
directives.
Implement the methods as:
public override void ViewDidAppear (bool animated)
{
base.ViewDidAppear (animated);
UIApplication.SharedApplication.StatusBarHidden = true;
}
public override void ViewDidDisappear (bool animated)
{
UIApplication.SharedApplication.StatusBarHidden = false;
base.ViewDidDisappear (animated);
}
Finally we need to respond to the user touching this view and we can do this with
another virtual method TouchesBegan().
public override void TouchesBegan (NSSet touches, UIEvent evt)
{
View.RemoveFromSuperview ();
}
This removes the torch view and so returns to the main screen. Notice that we access
the controller's view using the View property (uppercase V),
as opposed to the view property (lowercase v), which is
present in the auto-generated class and happens to return null not
what we want.
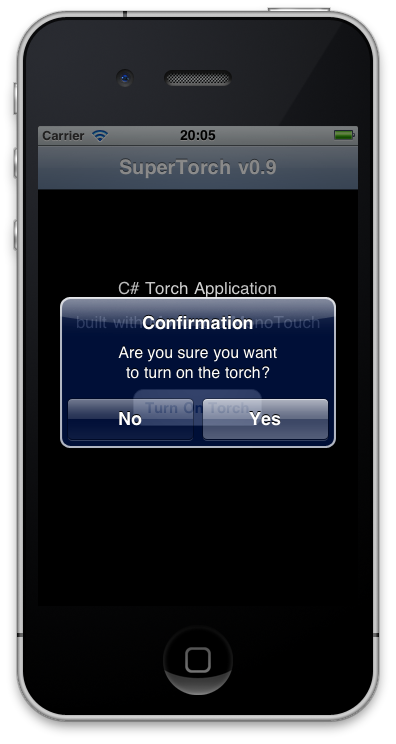
This will work acceptably, however we haven’t yet added in the user confirmation
step. This can be done by invoking a UIAlertView from the button's
TouchUpInside handler back in Main.cs. The alert view is set up with
the required title, message buttons (Yes and No) and a callback.
When you display the alert view the UI thread does not block but instead returns
immediately. The callback you pass in will be set to be the alert view’s Clicked
event handler and will run when the user presses a button to dismiss the alert.
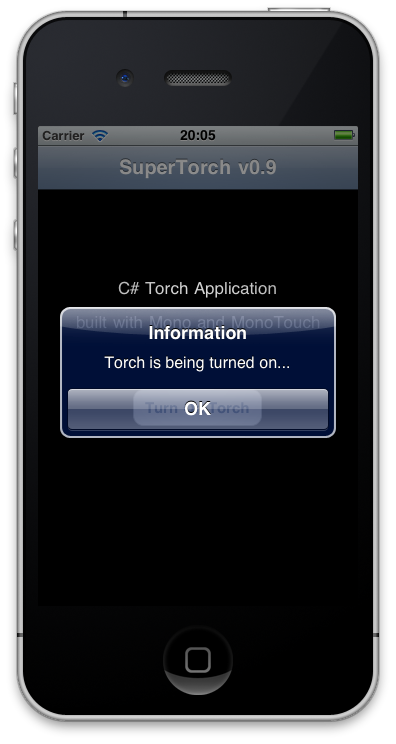
In this case if the user presses Yes another alert will be displayed announcing
the status – the torch will be turned on. Of course if they press No, then
we shall do nothing.
It may be the case that excessive confirmations and messages can be annoying to
the user, but at least this gives us a chance to see how to implement them for when
they are needed. Again, when the second alert is displayed the UI thread will continue
onwards and turn the torch on immediately before the alert is dismissed. To delay
the torch screen until this status alert goes away we can attach an event handler
to the Dismissed event.
private void TorchLaunch (object sender, UIButtonEventArgs e)
{
if (torchController == null)
torchController = new TorchController ();
window.AddSubview (torchController.View);
}
void TorchLaunchConfirm (object sender, UIButtonEventArgs e)
{
if (e.ButtonIndex == 1)
InfoAlert ("Information", "Torch is being turned on...", TorchLaunch);
}
// This method is invoked when the application has loaded its
            UI and its ready to run
public override bool FinishedLaunching (UIApplication app, NSDictionary options)
{
torchButton.TouchUpInside += delegate {
ConfirmAlert ("Confirmation", "Are you sure you want\nto turn on the torch?", TorchLaunchConfirm);
};
window.MakeKeyAndVisible ();
return true;
}
InfoAlert() and ConfirmAlert() are (rather similar looking)
helper routines that look like this:
private void InfoAlert (string title, string message, EventHandler<UIButtonEventArgs> callback)
{
using (UIAlertView av = new UIAlertView (title, message, null, "OK")) {
av.Dismissed += callback;
av.Show ();
}
}
private void ConfirmAlert (string title, string message, EventHandler<UIButtonEventArgs> callback)
{
using (UIAlertView av = new UIAlertView (title, message, null, "No", "Yes"))
{
av.Clicked += callback;
av.Show ();
}
}
And now we have our working torch application for the iPhone!
If you wish to make any comments on this article, your best options are to comment on the blog post that announced it, use the Contact Me form or email me at .
If you find this article useful please consider making a Paypal donation. It will be appreciated however big or small it might be and will encourage Brian to continue researching and writing about interesting topics in the future.
Or if you have some idle time, maybe you could click on some of these ads and see what interesting sites you are taken to.
Brian Long has spent the last 1.5 decades as a trainer, trouble-shooter and mentor focusing on the Delphi, C# and C++ languages, and the Win32, .NET and Mono platforms, recently adding iOS and Android onto the list. In his spare time, when not exploring the Chiltern Hills on his mountain-bike or pounding the pavement in his running shoes, Brian has been re-discovering and re-enjoying the idiosyncrasies and peccadilloes of Unix-based operating systems. Besides writing a Pascal problem-solving book in the mid-90s he has contributed chapters to several books, written countless magazine articles, spoken at many international developer conferences and acted as occasional Technical Editor for Sybex. Brian has a number of online articles that can be found at http://blong.com and a blog at http://blog.blong.com.
© 2011 Brian Long Consulting and Training Services Ltd. All Rights Reserved.
Go back to the top of this page